通用
杀死进程
pkill -f
open ssh 升级
下载地址
wget https://mirrors.aliyun.com/pub/OpenBSD/OpenSSH/portable/安装依赖
yum install systemd-devel pam-devel zlib-devel gcc openssl-devel编译
./configure --prefix=/usr/local/openssh-9.9 --sysconfdir=/usr/local/openssh-9.9/etcmake && sudo make install更改配置
etc/sshd_config
Port 22222

PermitRootLogin yes
启动
sudo /usr/local/openssh-9.9/sbin/sshd -f /usr/local/openssh-9.9/etc/sshd_config更新
/usr/lib/systemd/system新建一个service sshd_new.service
[Unit]
Description=OpenSSH server daemon
Documentation=man:sshd(8) man:sshd_config(5)
After=network.target sshd-keygen.target
Wants=sshd-keygen.target

[Service]
Type=notify
EnvironmentFile=-/etc/sysconfig/sshd
ExecStart=/usr/local/openssh-9.9/sbin/sshd -D -f /usr/local/openssh-9.9/etc/sshd_config $OPTIONS
ExecReload=/bin/kill -HUP $MAINPID
KillMode=process
Restart=on-failure
RestartSec=42s

[Install]
WantedBy=multi-user.target
注意
先启动到22222端口,在其他服务器用22222端口连接
systemctl daemon-reload
systemctl status sshd_new
systemctl start sshd_new
更改成22端口后
systemctl restart sshd_new
systemctl stop sshd
systemctl restart sshd_new
ssh 免密登录
将公钥复制到远程服务器的.ssh/authorized_keys 中
atop 查看历史运行情况
atop -r /var/log/atop/atop_20250529 -b 09:00
ssh 私钥登录
ssh-keygen -t rsa
cat ~/.ssh/id_rsa.pub >> ~/.ssh/authorized_keys
密钥不生效查看权限不正确
chmod 700 ~/.ssh
chmod 600 ~/.ssh/authorized_keys
chmod 600 ~/.ssh/id_rsa
常用命令
ls -l | more   # 查看文件夹
ls -lt        # 从新到旧排序(最近的排前面)
ls -ltr       # 从旧到新排序(反转顺序)
ls | wc -l # 统计文件数
添加sudo
echo "hadoop ALL=(ALL) NOPASSWD: ALL" >> /etc/sudoers重置root密码
LANG=en_US.UTF-8,在后面追加rw single init=/bin/bash,然后按ctrl+x重启系统
passwd
4、如果开启了SELinux,执行命令touch /.autorelabel命令
5、输入exec /sbin/init命令重启系统
6、使用新设置的密码进入系统之后,为了安全起见,可以输入reboot重新启动一次系统。
图形化界面
yum -y groups install "GNOME Desktop"
yum -y install xrdp
systemctl start xrdp
使用远程桌面连接
快速移动大约40GB的数据
rsync可以在两个目录之间同步数据,并且可以非常高效地处理大文件和大目录
rsync -avh /source_directory/ /destination_directory/
这个命令会将 /source_directory 中的所有文件和子目录复制到 /destination_directory,并保持文件权限和时间戳。
防火墙
注意
docker 网络可能影响防火墙,如果开放端口不生效 需要先重启docker
ufw status

ufw allow 22

sudo ufw allow from 192.168.1.100

ufw status添加端口
firewall-cmd --permanent --add-port=4000/tcp && systemctl restart firewalld删除端口
firewall-cmd --zone=public --remove-port=443/tcp --permanent添加ip
firewall-cmd --permanent --add-rich-rule="rule family="ipv4" source address="server191.bd.jz" accept"开放网段
sudo firewall-cmd --permanent --add-source=192.168.3.0/24 && systemctl restart firewalld
指定ip放行指定端口
# 放行 3306
firewall-cmd --permanent --add-rich-rule='rule family="ipv4" source address="172.19.0.1" port protocol="tcp" port="3306" accept'
sudo权限
echo "deploy ALL=(ALL) NOPASSWD: ALL" >> /etc/sudoers
服务自启
/usr/lib/systemd/system
systemctl daemon-reload
[Unit]
Description=The nginx HTTP and reverse proxy server
After=network-online.target remote-fs.target nss-lookup.target
Wants=network-online.target

[Service]
Type=forking
PIDFile=/run/nginx.pid
# Nginx will fail to start if /run/nginx.pid already exists but has the wrong
# SELinux context. This might happen when running `nginx -t` from the cmdline.
# https://bugzilla.redhat.com/show_bug.cgi?id=1268621
ExecStartPre=/usr/bin/rm -f /run/nginx.pid
ExecStartPre=/usr/sbin/nginx -t
ExecStart=/usr/sbin/nginx
ExecReload=/usr/sbin/nginx -s reload
KillSignal=SIGQUIT
TimeoutStopSec=5
KillMode=mixed
PrivateTmp=true

[Install]
WantedBy=multi-user.target[Unit]
Description=My Node.js Application
After=mysqld.service
[Service]
User=root
WorkingDirectory=/home/soft/report/build
ExecStart=/usr/local/bin/npm run start
ExecStop=/usr/local/bin/npm run stop
Restart=always
RestartSec=10
Environment=NODE_ENV=production
RemainAfterExit=yes # 解决systemctl在service处于inactive状态时会自动调用ExecStop
[Install]
WantedBy=multi-user.target磁盘挂载
检查 LVM 的配置和使用情况
lsblk
vgdisplay
lvdisplay
扩展逻辑卷
将所有未分配的 PE 分配给 /dev/ubuntu-vg/ubuntu-lv。你可以使用 lvextend 命令:
bash
复制代码
lvextend -l +100%FREE /dev/ubuntu-vg/ubuntu-lv
这里 -l +100%FREE 表示将所有未分配的空间都分配给逻辑卷。扩展文件系统
扩展逻辑卷后,还需要扩展文件系统以利用新的空间。假设你使用的是 ext4 文件系统:
bash
复制代码
resize2fs /dev/ubuntu-vg/ubuntu-lv
查看可以使用的磁盘
fdisk -l
fdisk /dev/vdc
n
p
回车
回车
回车
t
8e
w

yum -y install lvm2
pvcreate /dev/vdc
mkfs.xfs -f /dev/vdc
mount /dev/vdc /easyv


blkid /dev/vdb1
vi /etc/fstab
UUID=d6da6281-84a2-4d5c-ab6e-41d17f0d94db /data  xfs defaults 0 0
查看pid详细信息
Linux在启动一个进程时,系统会在/proc下创建一个以PID命名的文件夹,在该文件夹下会有我们的进程的信息,其中包括一个名为exe的文件即记录了绝对路径,通过ll或ls –l命令即可查看
cwd符号链接的是进程运行目录;
exe符号连接就是执行程序的绝对路径;
cmdline就是程序运行时输入的命令行命令;
environ记录了进程运行时的环境变量;
fd目录下是进程打开或使用的文件的符号连接
wget
wget http://120.26.77.177:11000/jz2.0/ --recursive --no-parent --http-user=admin --http-passwd=Shingi@2023
--recursive --no-parent 递归下载目录所有
进程监控
cesi supervisor
cd pushd popd dirs
pushd /home
dirs -p -v
-p 参数可以每行一个目录的形式显示堆栈中的目录列表
-v 参数可以在目录前加上编号
-c 清空目录堆栈
pushd 不加参数 在最近的两个目录之间切换
在多个目录之间切换
pushd +n
popd
pushd:切换到作为参数的目录,并把原目录和当前目录压入到一个虚拟的堆栈中
如果不指定参数,则会回到前一个目录,并把堆栈中最近的两个目录作交换
popd: 弹出堆栈中最近的目录
dirs: 列出当前堆栈中保存的目录列表
文件权限
4 -r
2 -w
1 -x
文件类型-用户-其他用户-组
添加组
usermod -G groupName userName
查看压缩包内容
tar --exclude='//*' -tf packages/grafana-enterprise-10.3.1.linux-amd64.tar.gz
vi 使用
1,$ 或% 全局替换
时间同步
timedatectl status

#设置上海时区
sudo timedatectl set-timezone Asia/Shanghai
主服务器停止了,注意重启后关闭防火墙,其他服务器需要先停止ntpd服务后手动同步一次,后再重启服务
systemctl stop ntpd
ntpdate ip-192.168.10.190.fd.com
systemctl start ntpd
systemctl stop ntpd && ntpdate ip-192.168.10.190.fd.com && systemctl start ntpd
在集群的所有服务器上安装ntp服务,用于集群时钟同步
yum -y install ntp
将ntpd加入系统自启动服务并设置开机启动
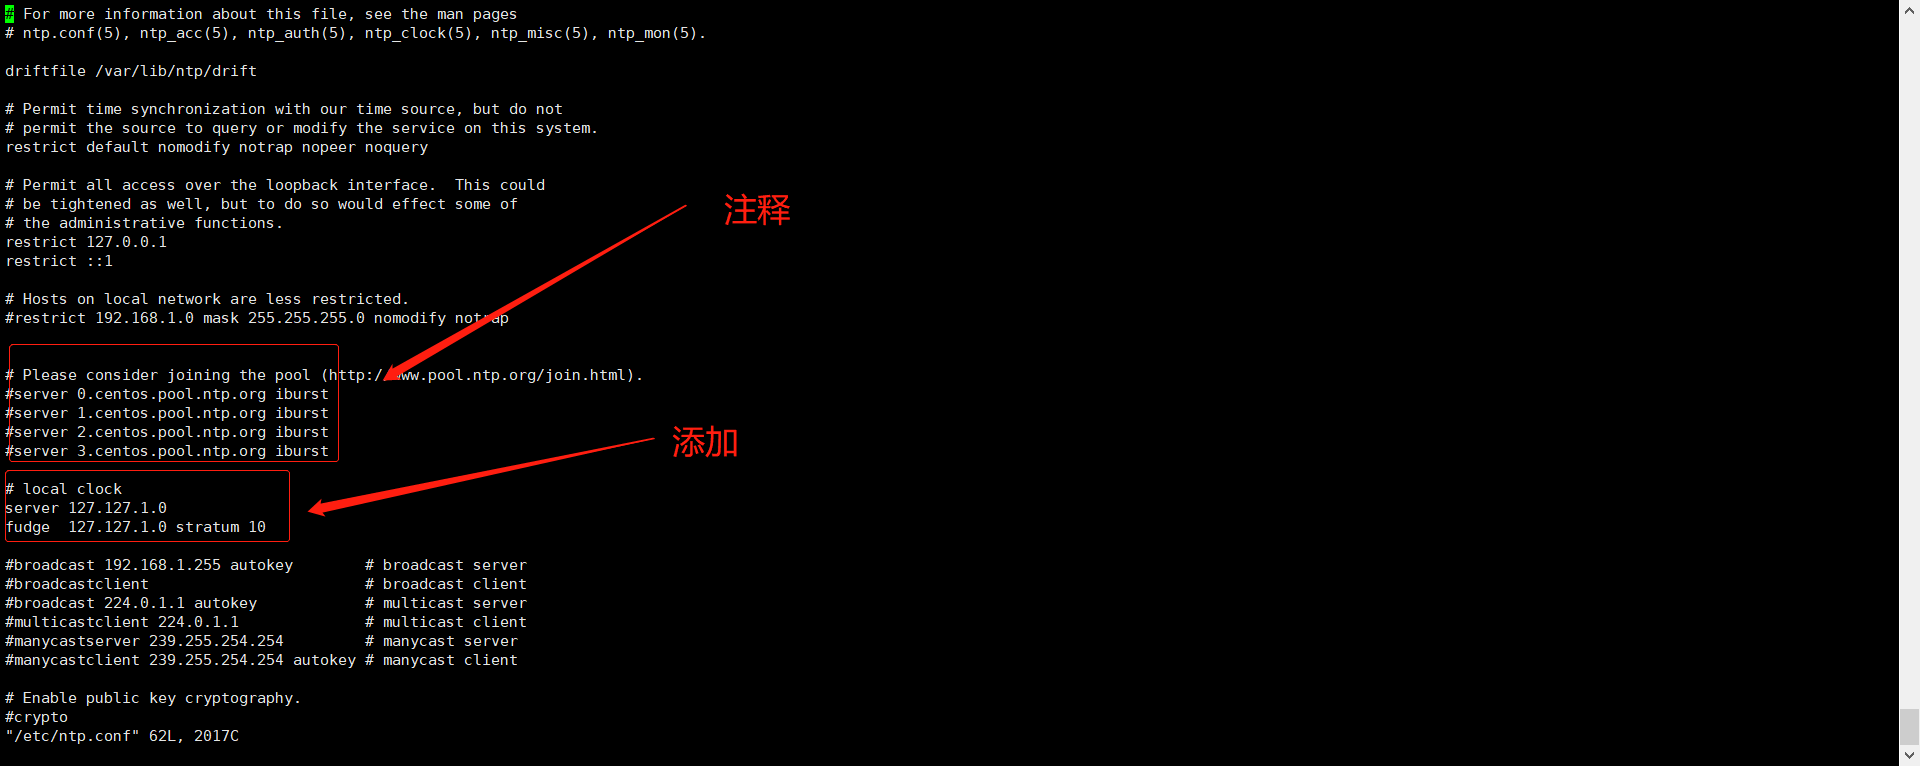
服务端
vim /etc/ntp.conf
添加
# local clock
server 127.127.1.0
fudge  127.127.1.0 stratum 10
注释掉所有的server
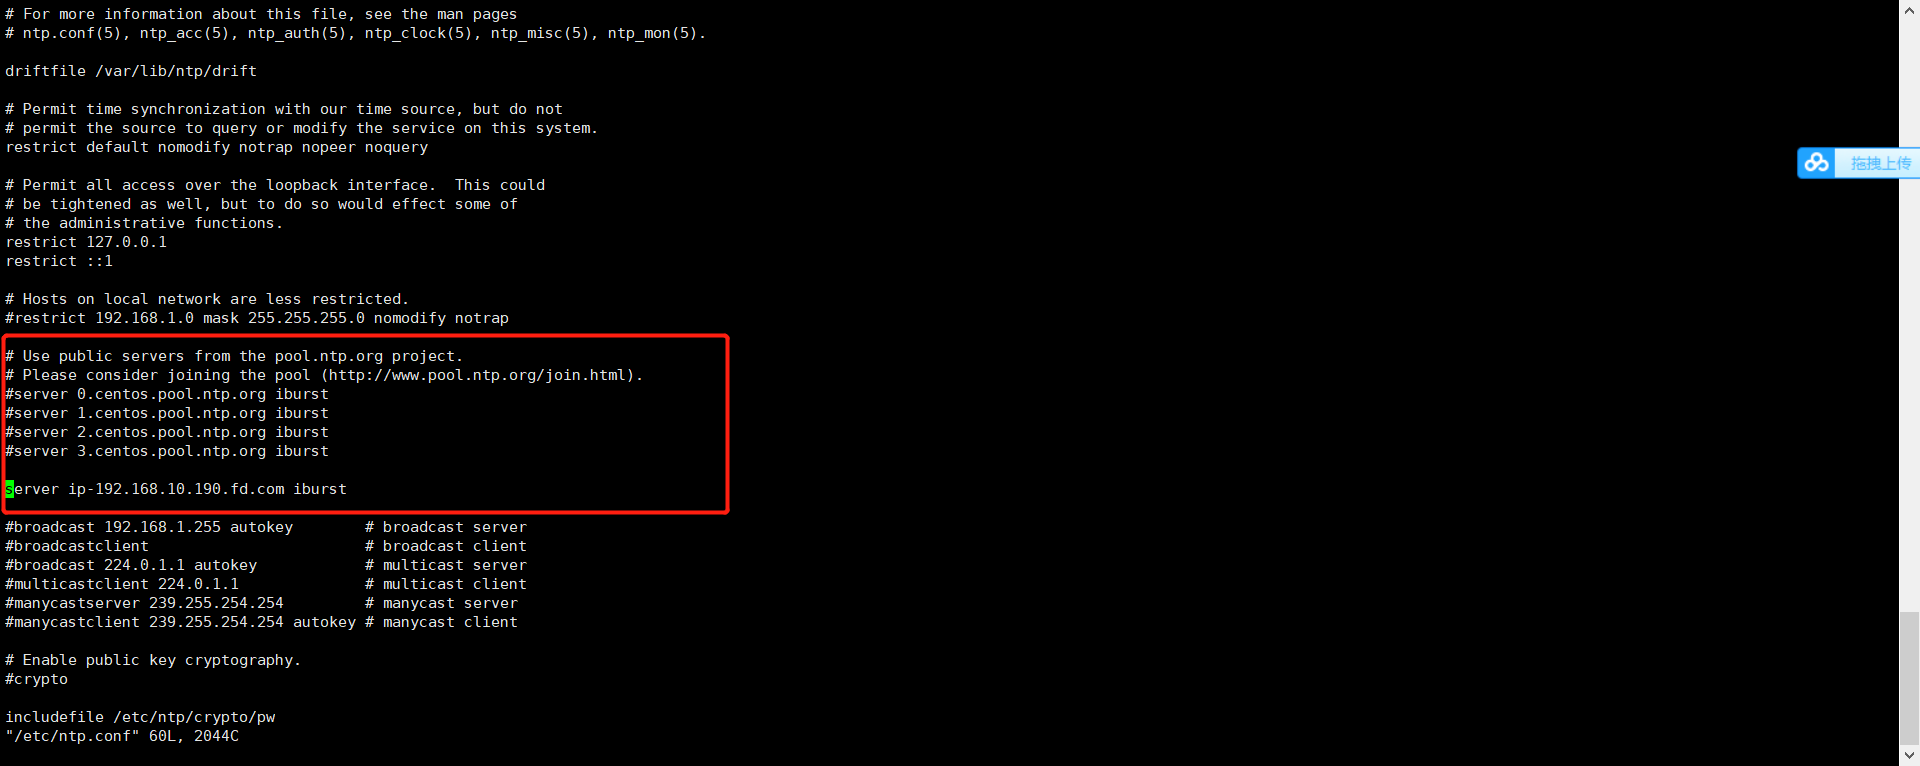
客户端
添加
server 服务端地址(ip-192.168.10.190.fd.com) iburst
- 手动同步一次时间
/usr/sbin/ntpdate ip-192.168.10.190.fd.com
- 重启集群所有节点的ntpd服务
systemctl restart ntpd
验证时钟同步,在所有节点执行
ntpq -p
有“*”显示则表示同步成功。需要等会
配置静态IP
cd /etc/netplan
vi

network:
  version: 2
  renderer: NetworkManager
  ethernets:
    enp0s5:   # 网卡名称
      dhcp4: no     # 关闭dhcp
      dhcp6: no
      addresses: [10.211.55.10/24]  # 静态ip
      gateway4: 10.211.55.1     # 网关
      nameservers:
        addresses: [8.8.8.8, 114.114.114.114] #dns


sudo netplan apply
设置hostname
hostnamectl --static set-hostname hostname添加路由
route add -host 192.168.8.65 gw 10.10.3.254